Just in time for St. Patrick’s Day, it’s time for another giant cured meat tutorial. Our cured meat of focus? Why, corned beef brisket, or course!
As you certainly know, there is no corn in corned beef. Originally corned beef was cured with chunky rock salt. Someone thought those nuggets of salt looked like corn kernels I guess, and corned beef has been confusing people ever since. If there were any logic in the world, we’d all just start calling it “Salted Beef” but I think we can all agree that tradition trumps logic 98% of the time.
So, you want to make your own corned beef at home? Great news, it’s really, really easy. Read on to learn how.
Step 1: Trim Your Beef Brisket
If you are starting with a whole beef brisket, you have an intimidating and rather amorphous hunk of fatty meat. To turn this into succulent corned beef requires a bit of knife work. If you are buying an already-trimmed piece of brisket, you can skip this step.
Meet Your Meat
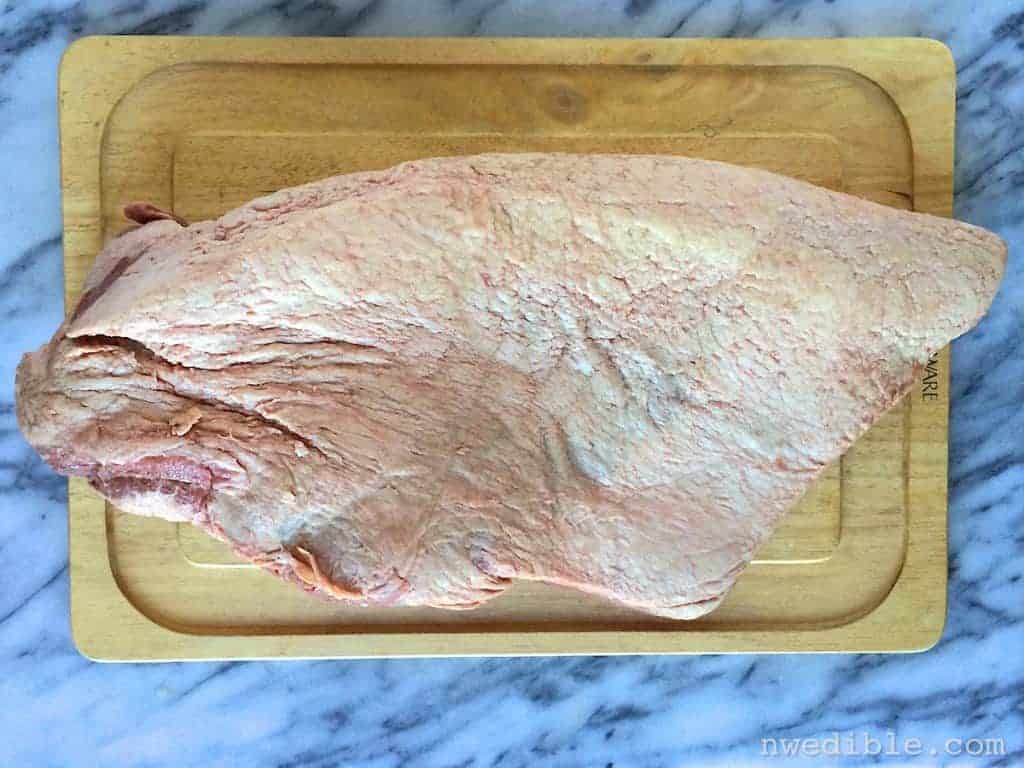
This is what a whole brisket looks like, fat-cap up.
And here is the same hunk-o-meat, fat cap down. In the fat-down position, the very defined grain of the meat is visible. This grain is the key to understanding how to deal with a brisket.
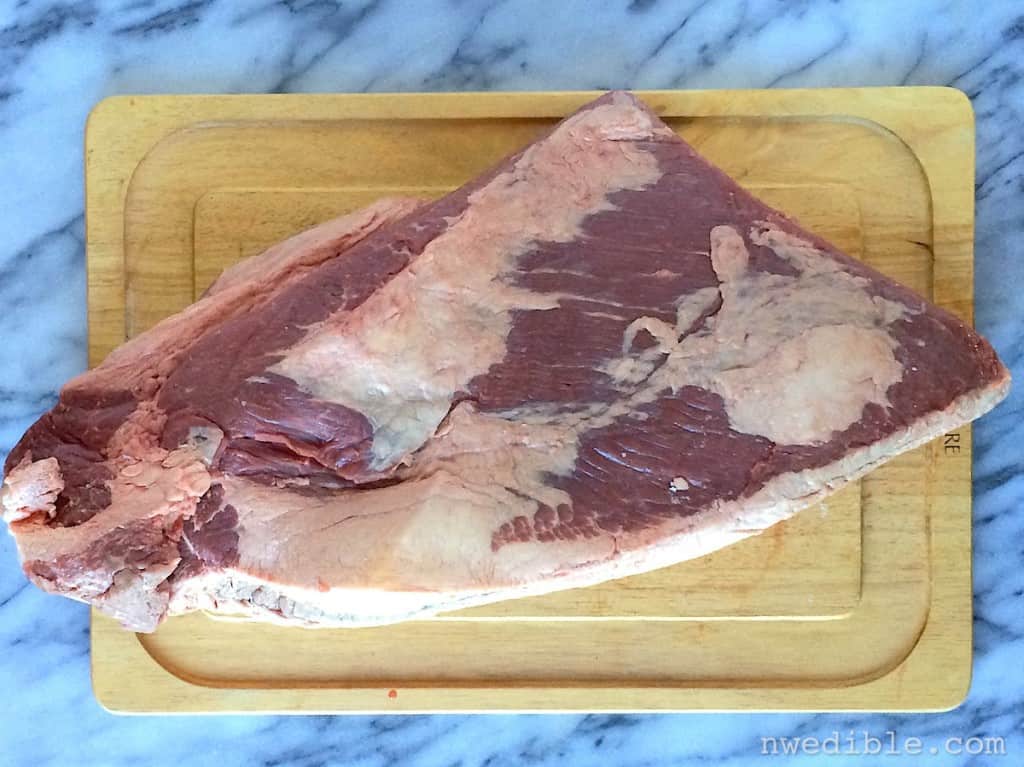
The Critical Issue Of Grain
Once the brisket is cooked, it should be sliced ACROSS the grain so that the finished meat is tender and delicious. Even if you cook the brisket perfectly, if you slice WITH the grain you end up meat that feels like rubber bands in your mouth.
The problem is, the full brisket is comprised of two-sub muscles, called the FLAT and the POINT. These two muscles have grains that run opposite each other, separated by a thick layer of fat. If you cook the brisket in one piece and then slice it, half your beef will be tender and half will chew like rubber-bands. This cross section shows the problem:

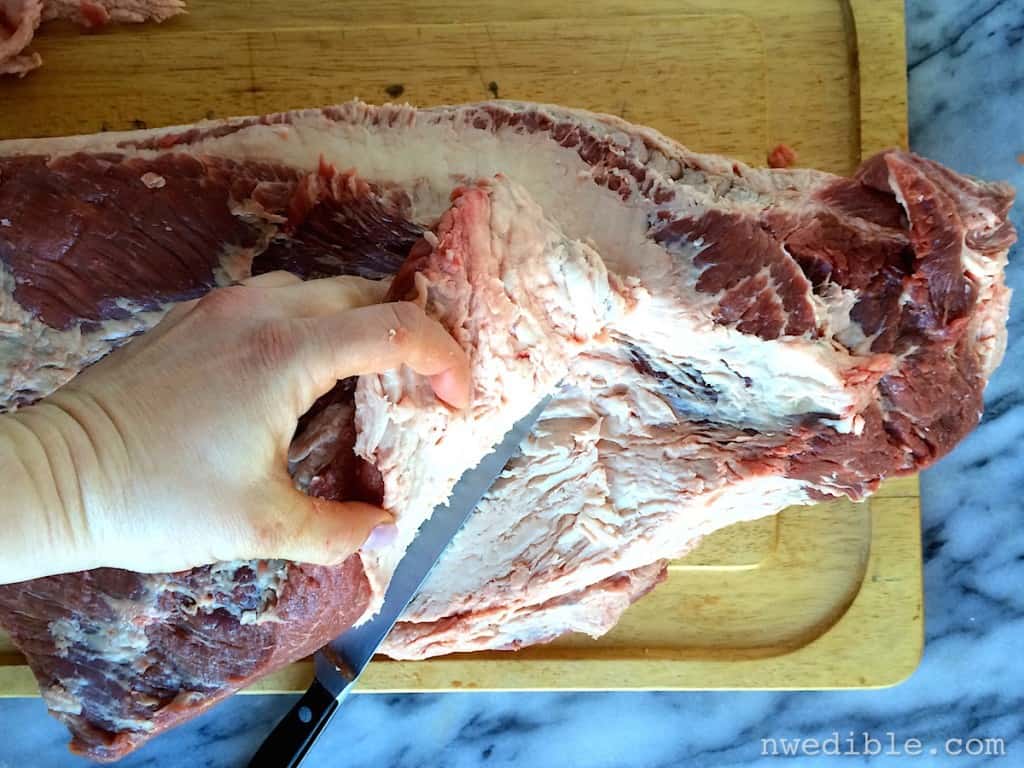
So our goal here is to follow that internal seam of fat to separate the FLAT from the POINT.
Trim excess fat from the underside of the full brisket to make it more clear where the FLAT and the POINT diverge.
In the photo below, you can see the general area of the FLAT, which is roughly rectilinear, and the POINT, which is…uh…pointy. If you look closely, you’ll see the grain change and fat seam that marks where to start cutting.

Just patiently follow that fat line until you have two distinct pieces of brisket.
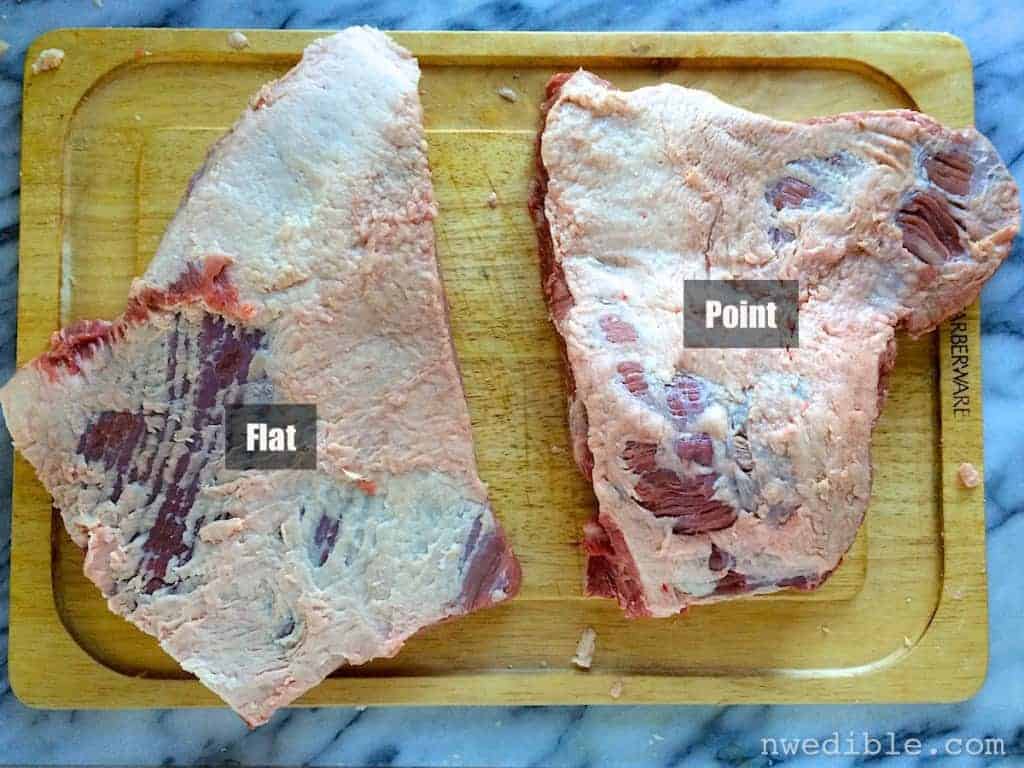
Eventually you’ll get to a point where the two pieces separate, or come close enough that a quick slice will finish the job. Here are my two pieces of brisket, the FLAT and the POINT, fat-cap-side up now. If you like a very lean brisket, you can trim additional fat from the brisket. I opted not to.
Step 2: Turning Plain Ol’ Brisket Into Corned Beef Brisket
The difference between brisket and corned beef brisket is a few days soaking in a brine. That is the entire difference. There’s no smoking, drying, stuffing or worrying about a pellicle, which makes corned beef brisket the easiest meat-cure I’ve ever done. If you can stir salt and water together, you can make corned beef.
Brine For Flavor and Color
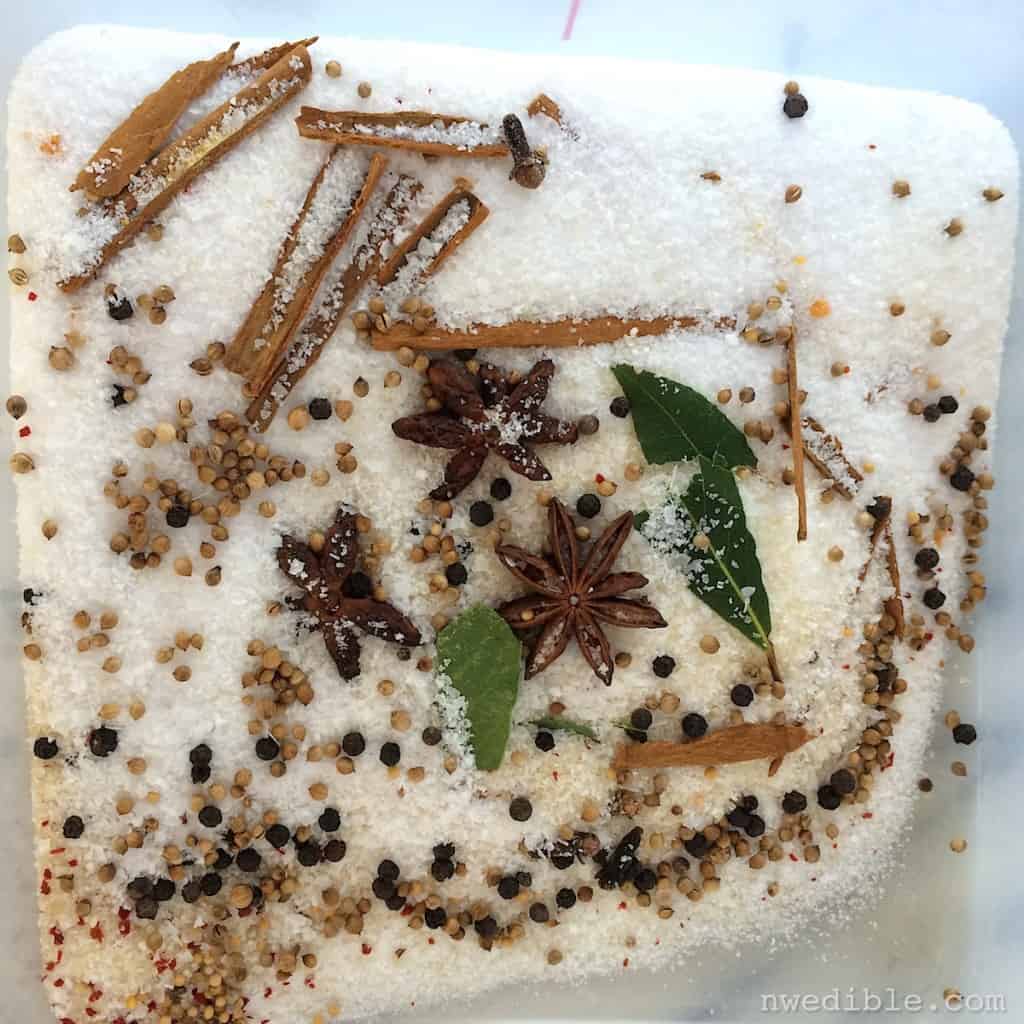
Start by combining the ingredients for your brine. The brine is a basic combination of salt, sugar and pink curing salt (this is what I use), enhanced with spices. Pink curing salt is what gives corned beef that red color, instead of the vague-grey color of pot roast.
I feel like I’ve covered pink curing salt a zillion times, but for folks who find this post via The Googlenator without having read my other Giant Meat Tutorials, see the footnote for important information on pink curing salt.
You can follow my spice suggestions, or use a ready-made pickling spice mix, or go wild and do your own thing. The brine is your first opportunity to make corned beef flavored your way.
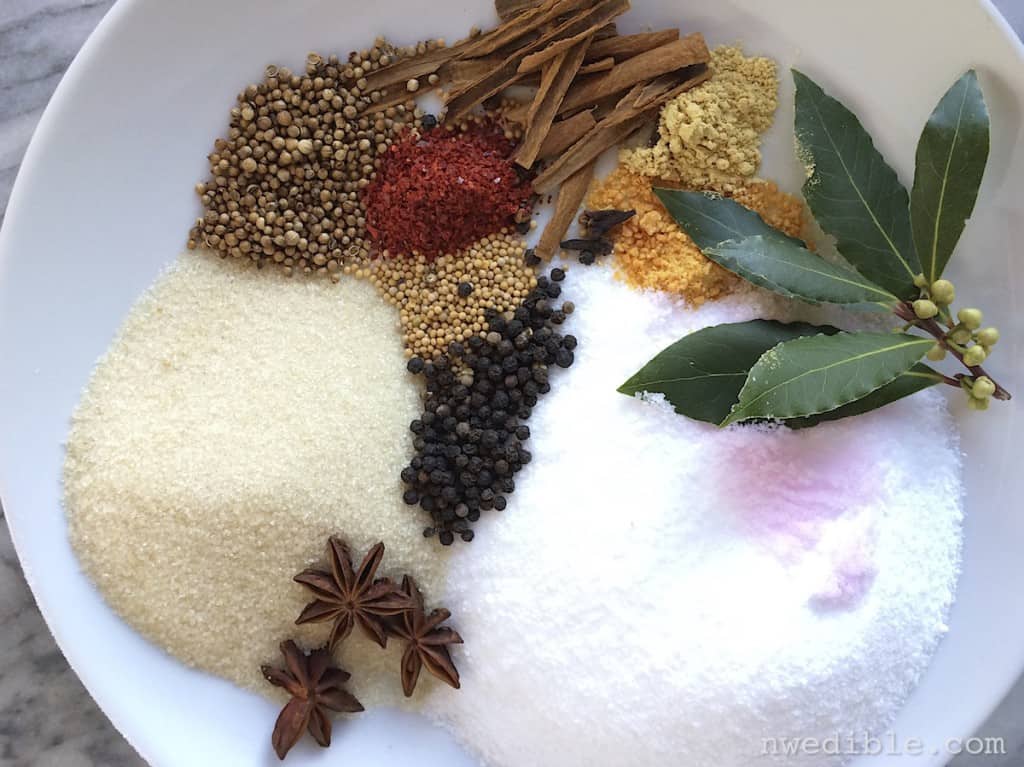
Add your brine ingredients to a large food-safe tub and add 2 quarts boiling water. Stir to dissolve, then let the brine cool to room temperature. (While the brine is cooling is actually a great time to trim your full brisket).
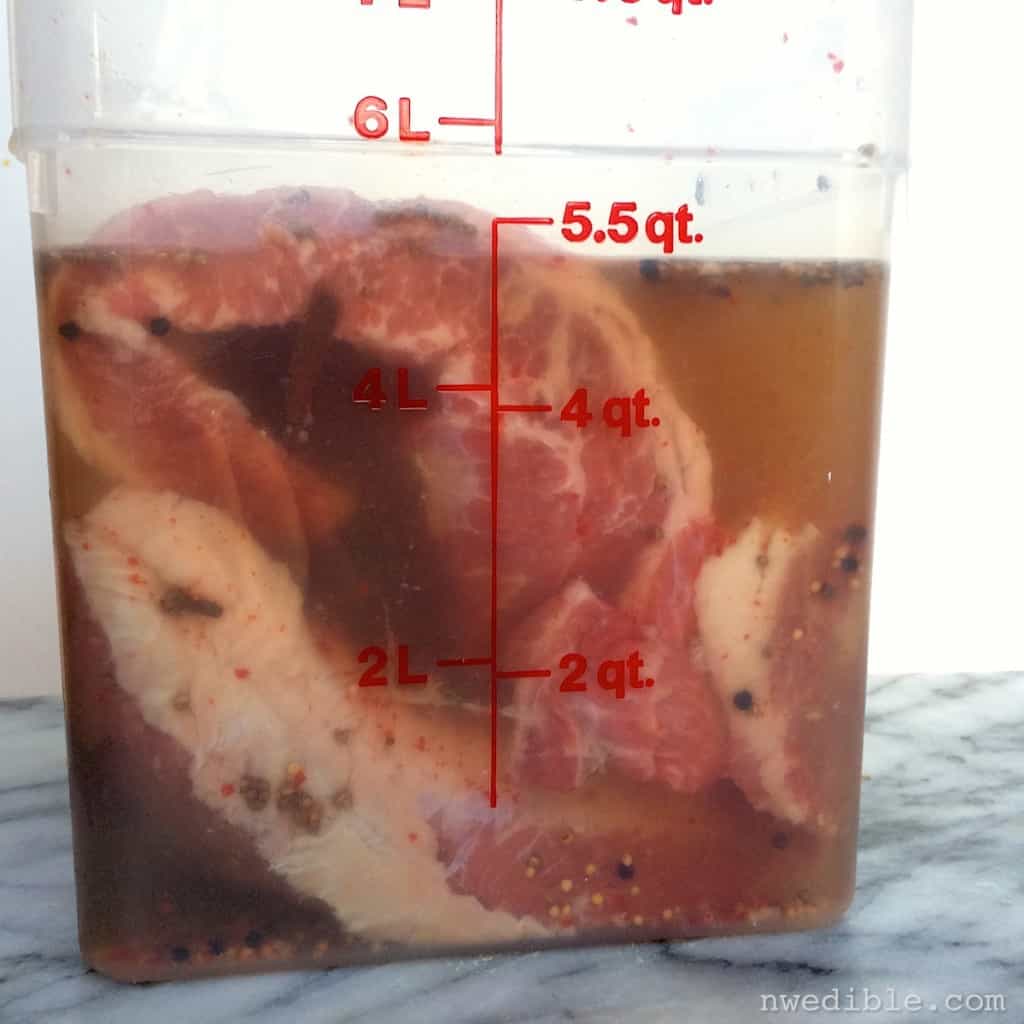
Once the brine has fully cooled, add in your hunk-o-meat and press it down under the brine.

If you started with a full brisket, you should be able to brine both halves in this quantity of brine. Just make sure the brine can fully surround the meat. See how part of the the brisket is sticking up out of the brine? That’s no good. Press all the meat under the brine, then cover and transfer the brisket in it’s brine to the fridge.
Step 3: Wait!
Now you wait patiently for the brine to fully suffuse your meat with the salty, spicy cure.
But How Long?
Good question, and one of the biggest variables in the corned beef recipes I read.
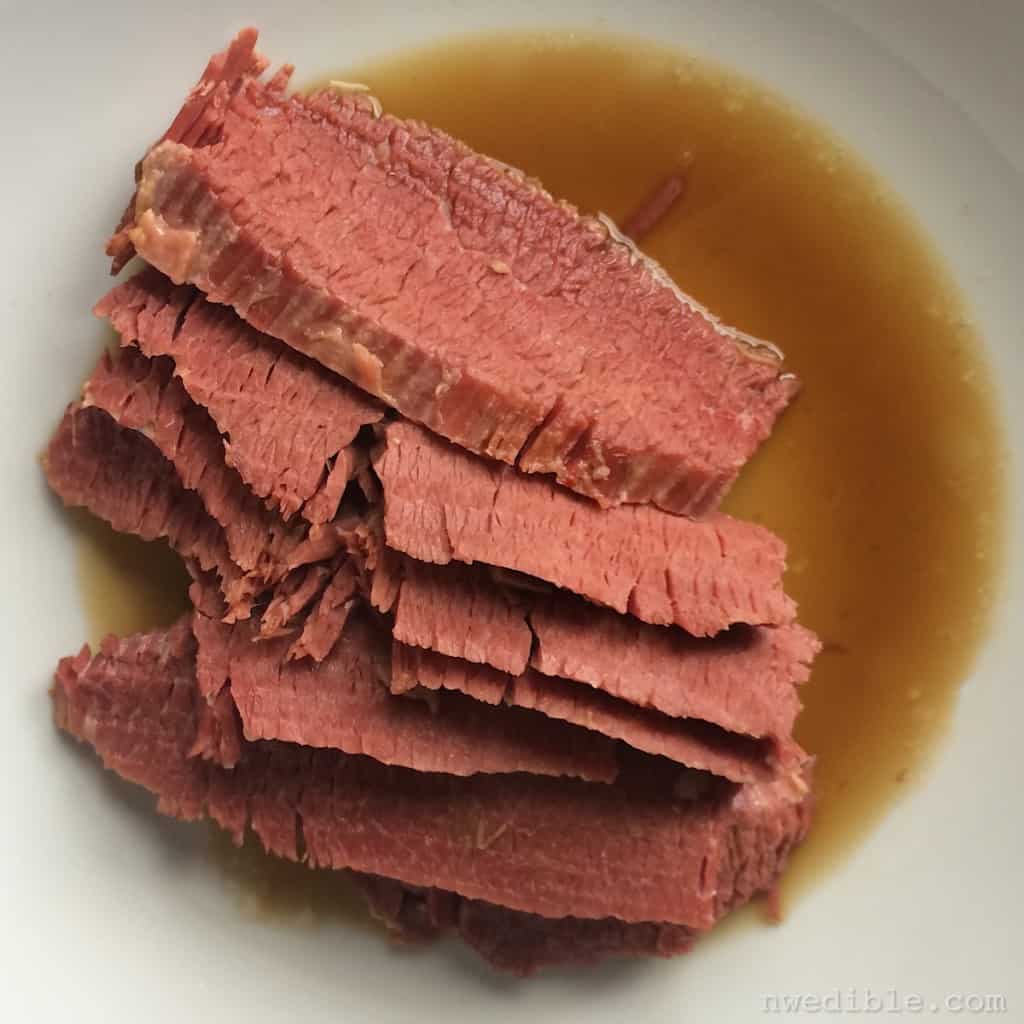
I pulled the FLAT from the cure after 3 days. Once I braised and sliced it (more on that later) it was clear that a 3-day soak was not long enough for the brine to fully penetrate the meat. The flavor was good, but the center of the corned beef was grey in places – not too pretty.
See that grey dot in a sea of pink? If you make corned beef like this and find a grey center section in your meat, nothing is dangerous and you can still eat the meat. The cure just didn’t fully penetrate the meat.
I let the thicker POINT brine for 5 days and got a more uniform cure and, I think, better flavor development.
Brine Time Conclusion
From my experiments I conclude:
- The brisket should brine at least 4 days, and up to a week, to ensure the cure can fully penetrate the brisket.
- Thicker, larger pieces should brine longer than thin or small-cut pieces.
- If time is short, time in brine can be shortened to 2 or 3 days, but appearance will suffer as parts of the center of the beef will be grey.
Step 4: Cook Your Corned Beef
Cooking your corned beef is your next opportunity to add flavor to the dish. You could just simmer the corned beef in water, but then you’d lose out on this awesome, flavor-building opportunity!
I cooked the FLAT and the POINT separately, two days apart, using two different braising recipes. The FLAT was braised with onion, carrot, celery, spices and Guinness beer. It turned out fine, but the beer made the braising liquid more bitter than I liked.
The POINT was braised in apple juice with a few spices thrown in. This was fast and easy, and the apple juice added a wonderful sweetness that went very well with the salty corned beef and the cloves and star anise I used in my cure.
Because I had a far better result with the apple juice braise, that’s the recipe I’m sharing below, but I want to be clear: you can pick your braising liquid. Stock, juice, wine and more can be added to your braising liquid.
Whatever you choose, you’ll need 4 cups total liquid. The corned beef is plenty salty all by itself, so there’s no need to add additional salt to the braising liquid.
Braise Your Corned Beef
Adjust your oven rack to the center-low position and preheat the oven to 325 degrees.
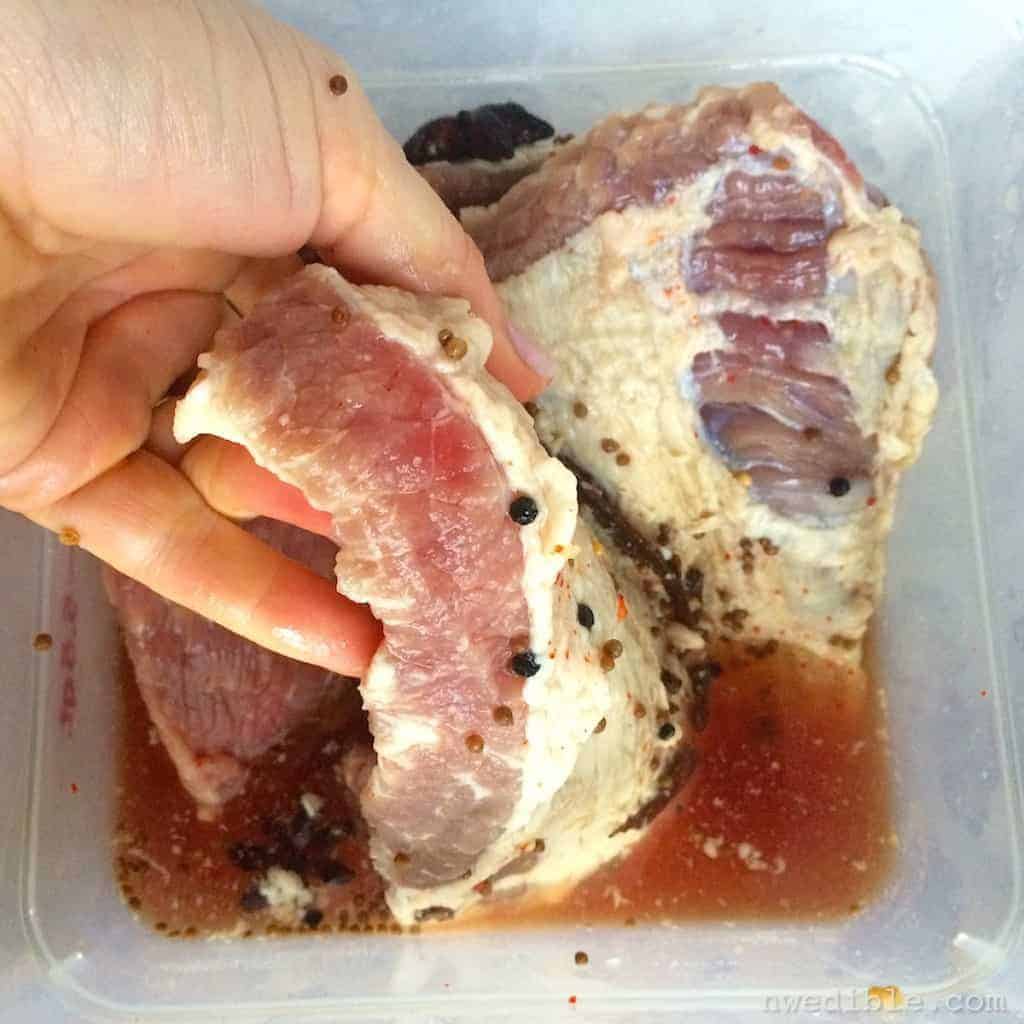
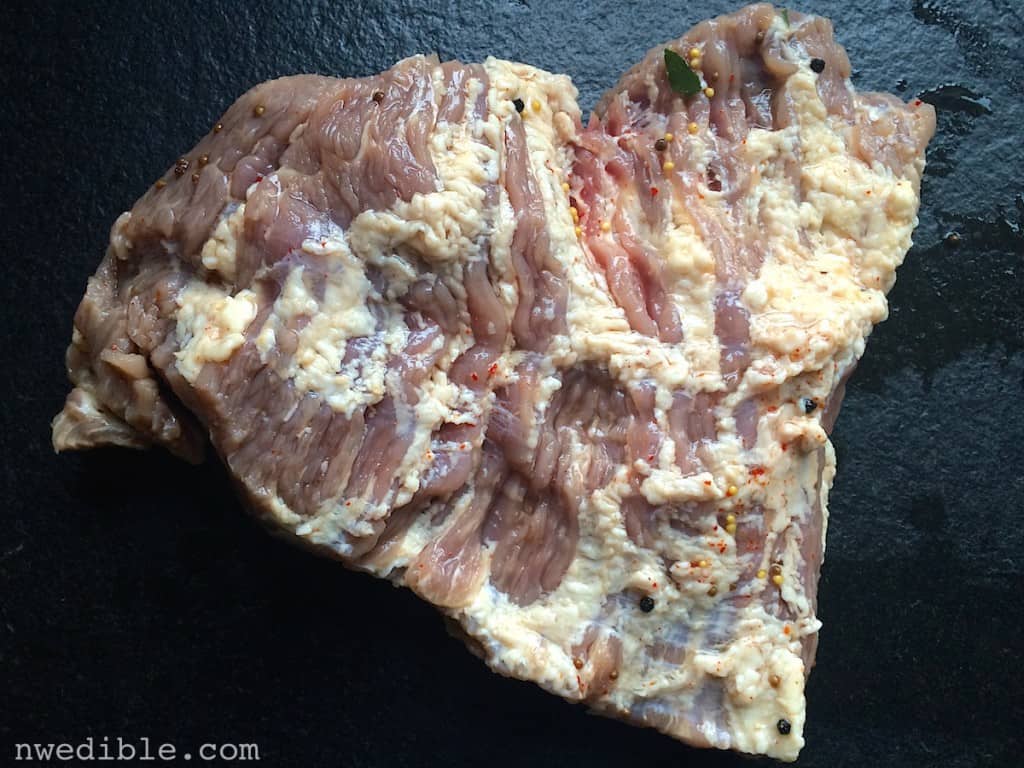
Pull your hunk-o-beef from the brine. It’s not exactly pretty, but it’ll do. You’ll probably see a bunch of spices clinging to the beef. Rinse the beef under running water to get those spices and any brine off the surface of the corned beef brisket.
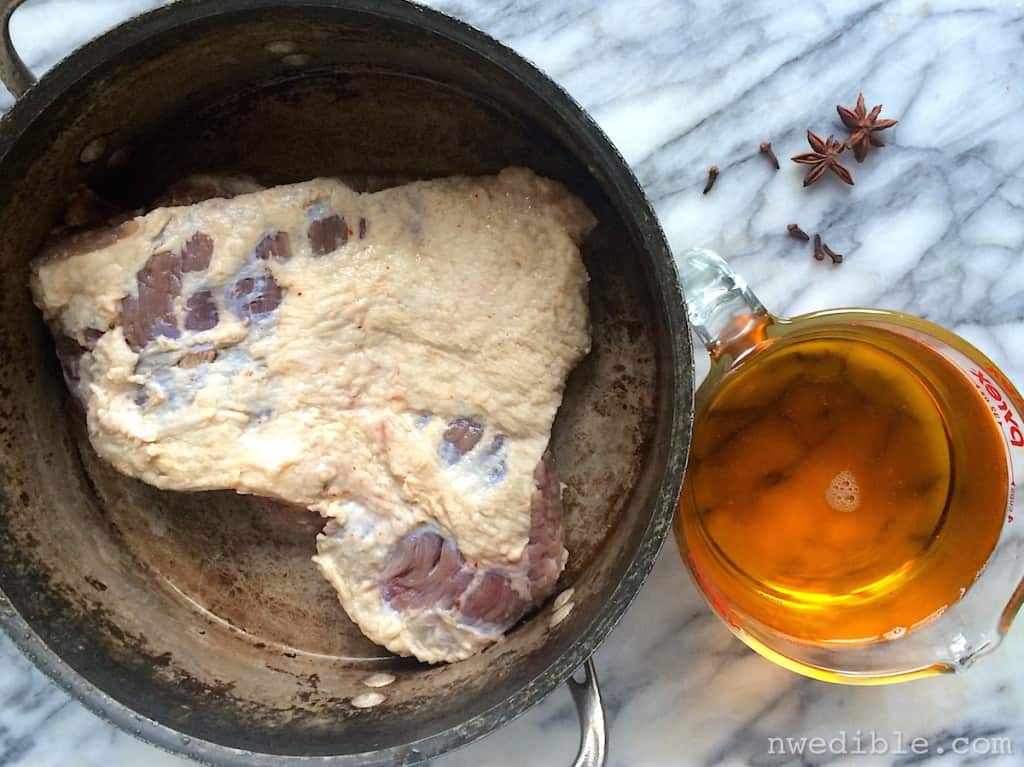
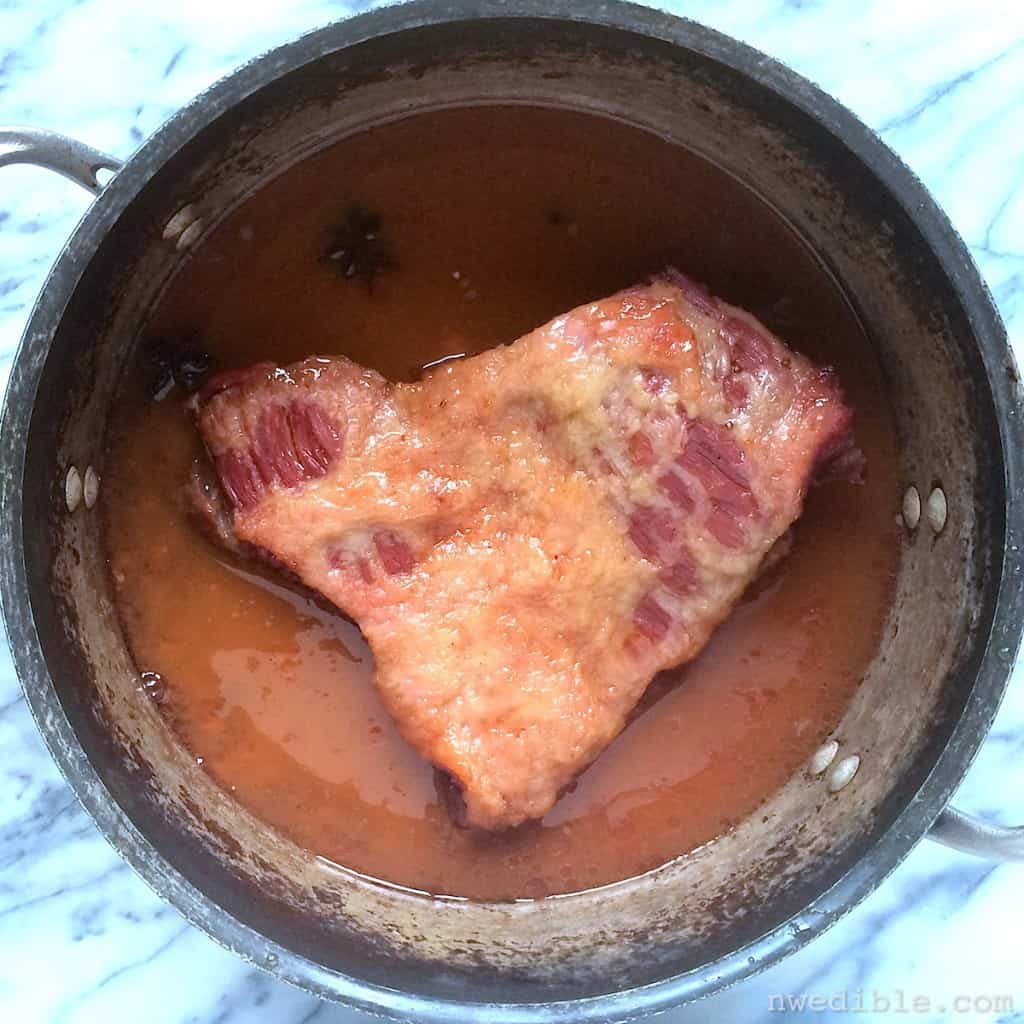
For this simple apple braise we’re using 4 cups apple juice or apple cider, plus a few spices. Just pop your corned beef into a large, shallow pot or dutch oven and add in the liquid and aromatics.
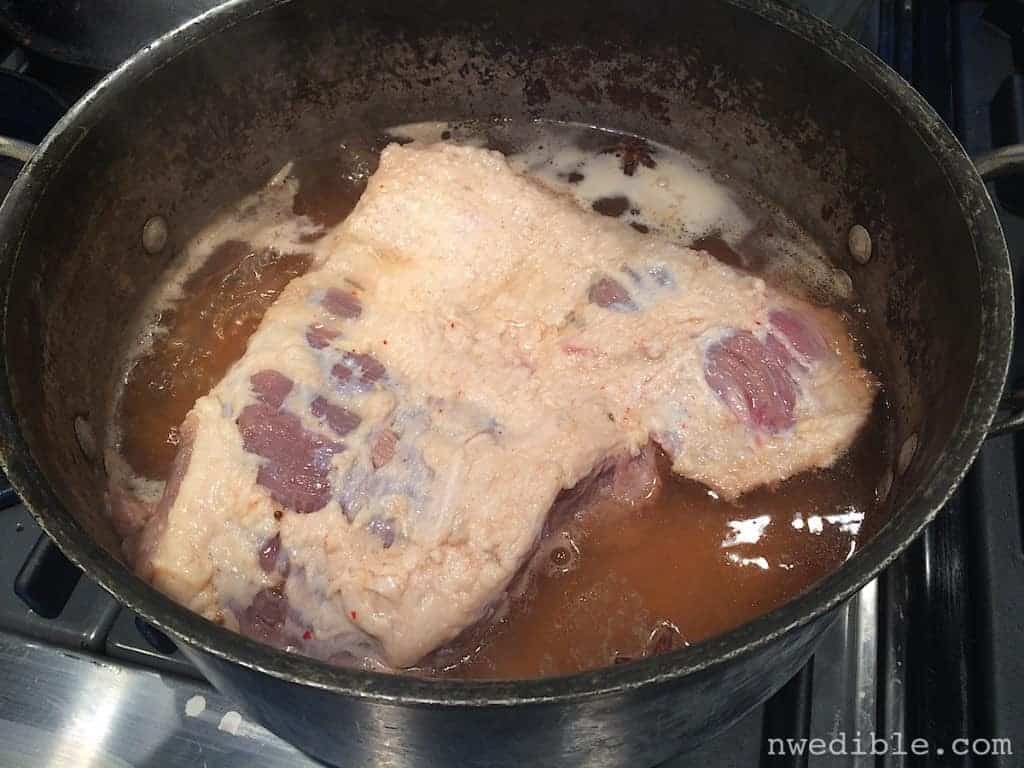
Bring everything up a gentle simmer over medium heat.
Using a Parchment Drop-Lid For Braising
I like to use a parchment “inner lid” when I’m braising big hunks of tough meat. This is a trick I learned from All About Braising: The Art of Uncomplicated Cooking, one of my all time favorite cookbooks.
The idea behind using a parchment drop-lid is that you keep the moisture of the braise more tightly around the meat, leading to a more flavorful and tender product. If you don’t have big sheets of parchment in your kitchen for this and 99 other handy things, you can just skip this bit.
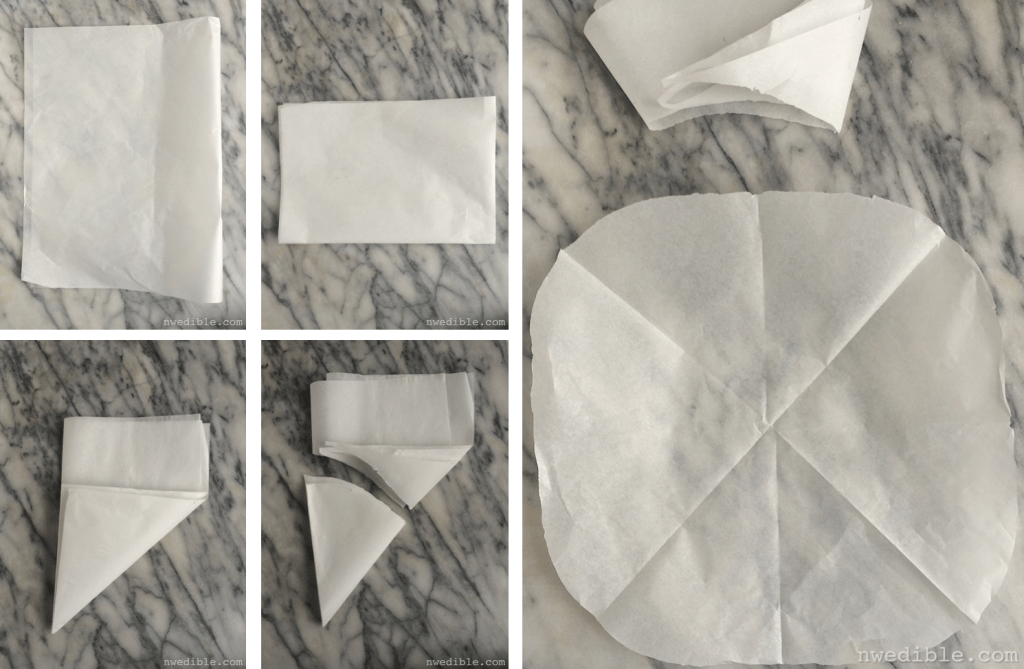
To make a parchment drop-lid, just fold a full-size sheet of parchment in half widthwise, then in half lengthwise. Fold the open edges of the parchment up to make a triangle shape, then cut or rip the triangle so that, when the parchment is unfolded, you gat a large, rough circle.
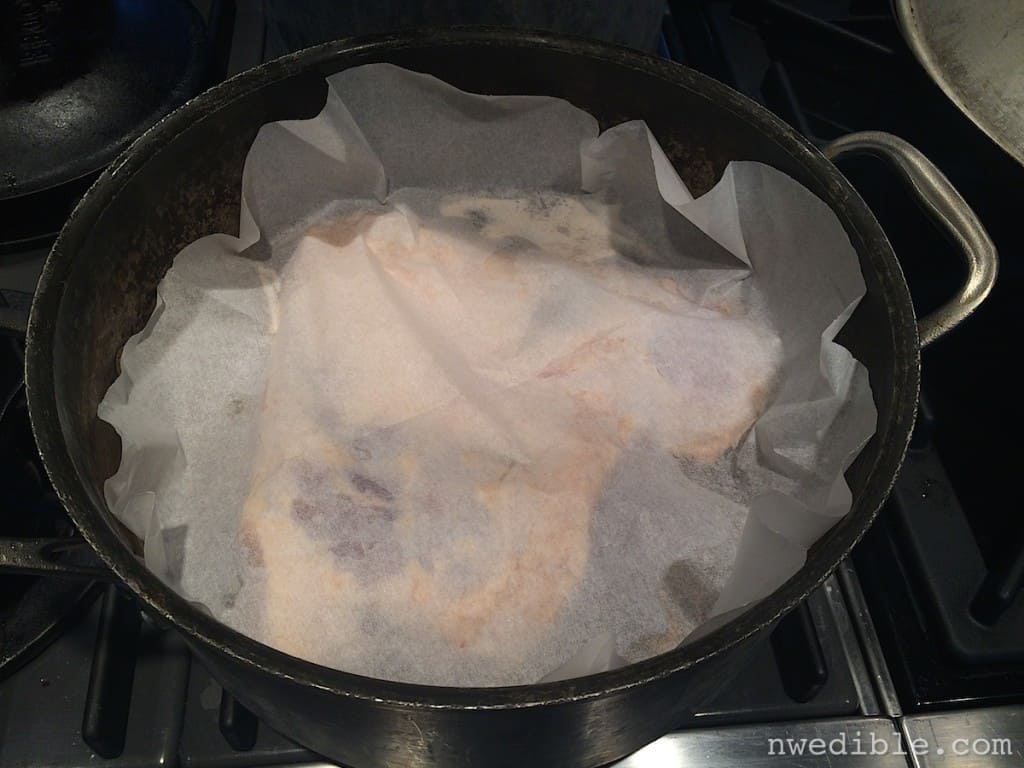
If using, smooth your parchment drop-lid right over the brisket…
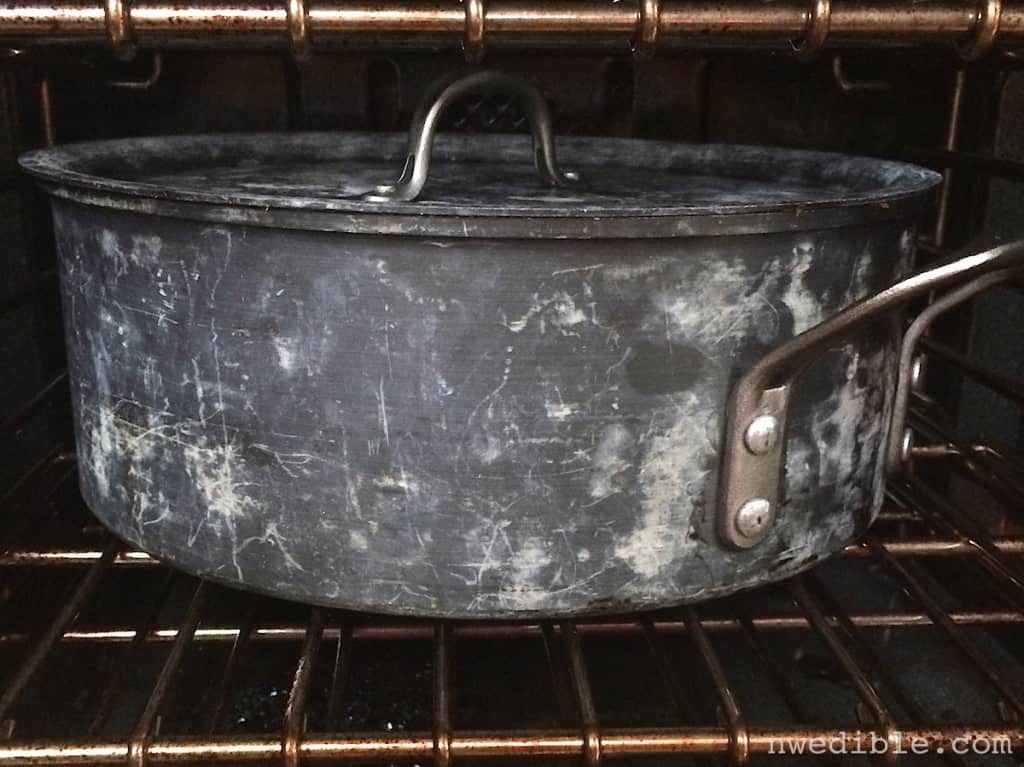
…then lid your pot or Dutch oven and transfer the whole thing to the oven and cook for about 2 hours, or until the corned beef is falling apart tender.
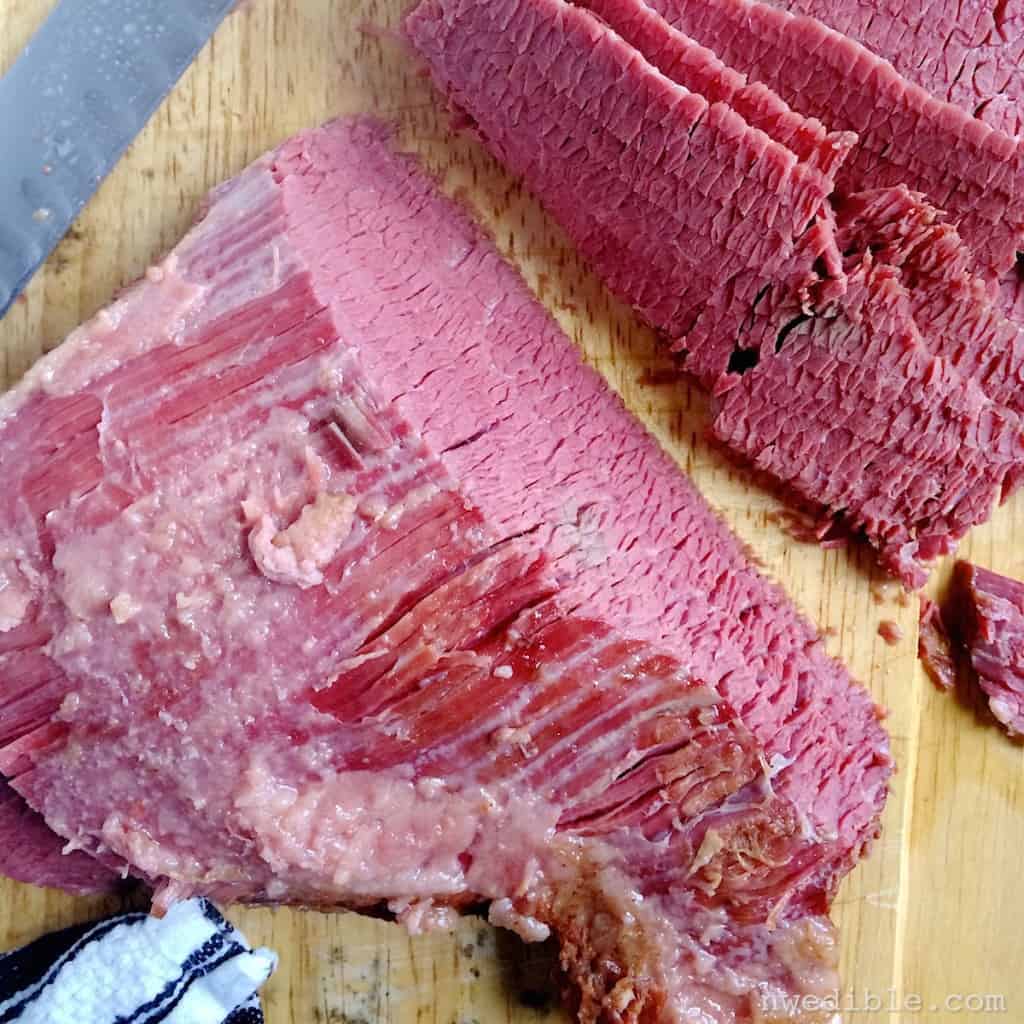
Step 5: Slicing and Serving Your Corned Beef Brisket
Once your corn beef is tender and succulent, pull it out of the oven.
At this point, there’s only one thing standing between you and corned beef perfection. That’s right, it’s our old friend the GRAIN.
It is critical that you slice your corned beef brisket across the grain so avoid that rubber band effect we discussed earlier. If you left the fat cap on your brisket you may want to scrape that fat off now. Not only is braised fat rather disgusting, it makes it difficult to see the grain.
Here’s the FLAT of the brisket. Note the strong upper-left to lower-right diagonal muscle striation. We want to cut across this. I’ve positioned my knife to show the angle you should follow when slicing your corned beef brisket.

And here’s the POINT, with a bit of the fat layer scraped away to show the grain. Again, my knife is positioned to show where you’d want to cut. (My knife is actually slightly off-angle in this photo because I was trying to take pictures and slice at the same time, but you get the idea.)
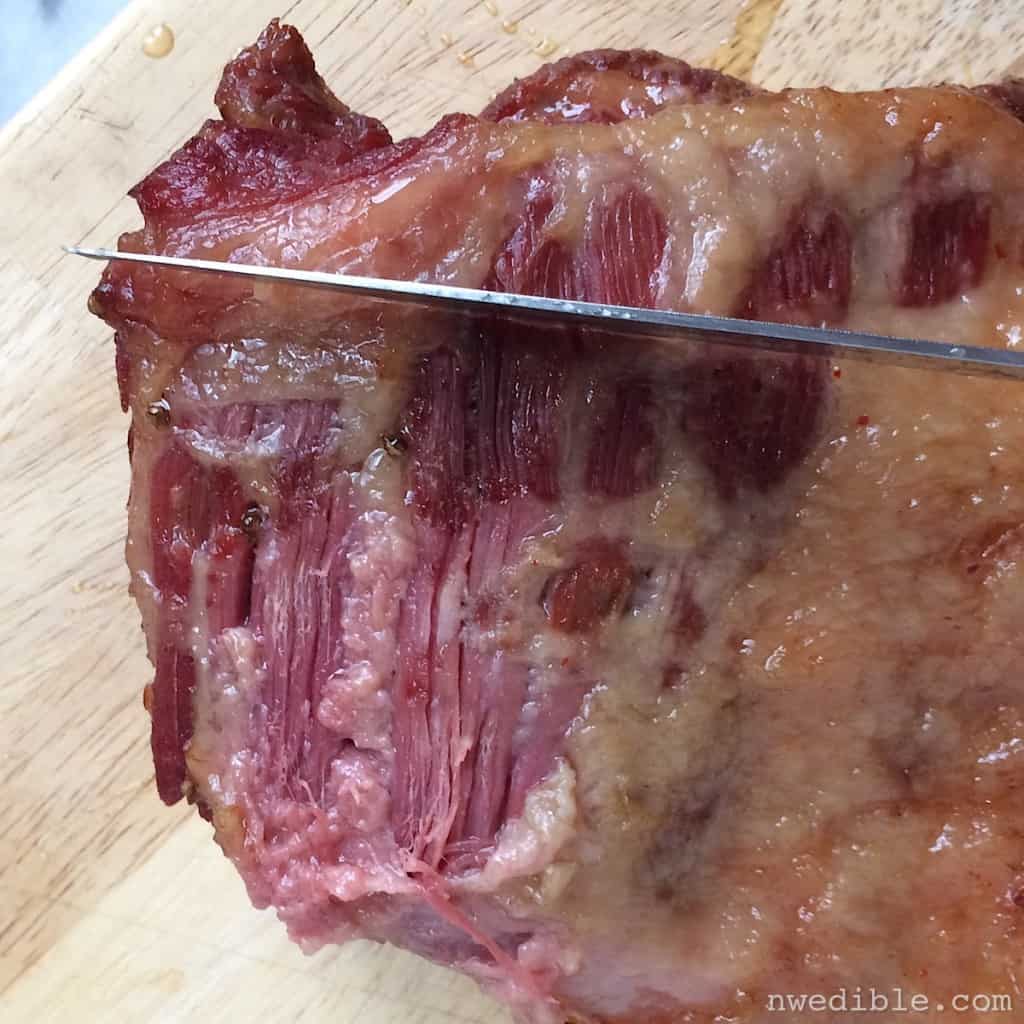
When you slice your corned beef properly, the muscle fibers presented to your teeth are very, very short and easy to chew. They seem tender and succulent instead of long and stringy.
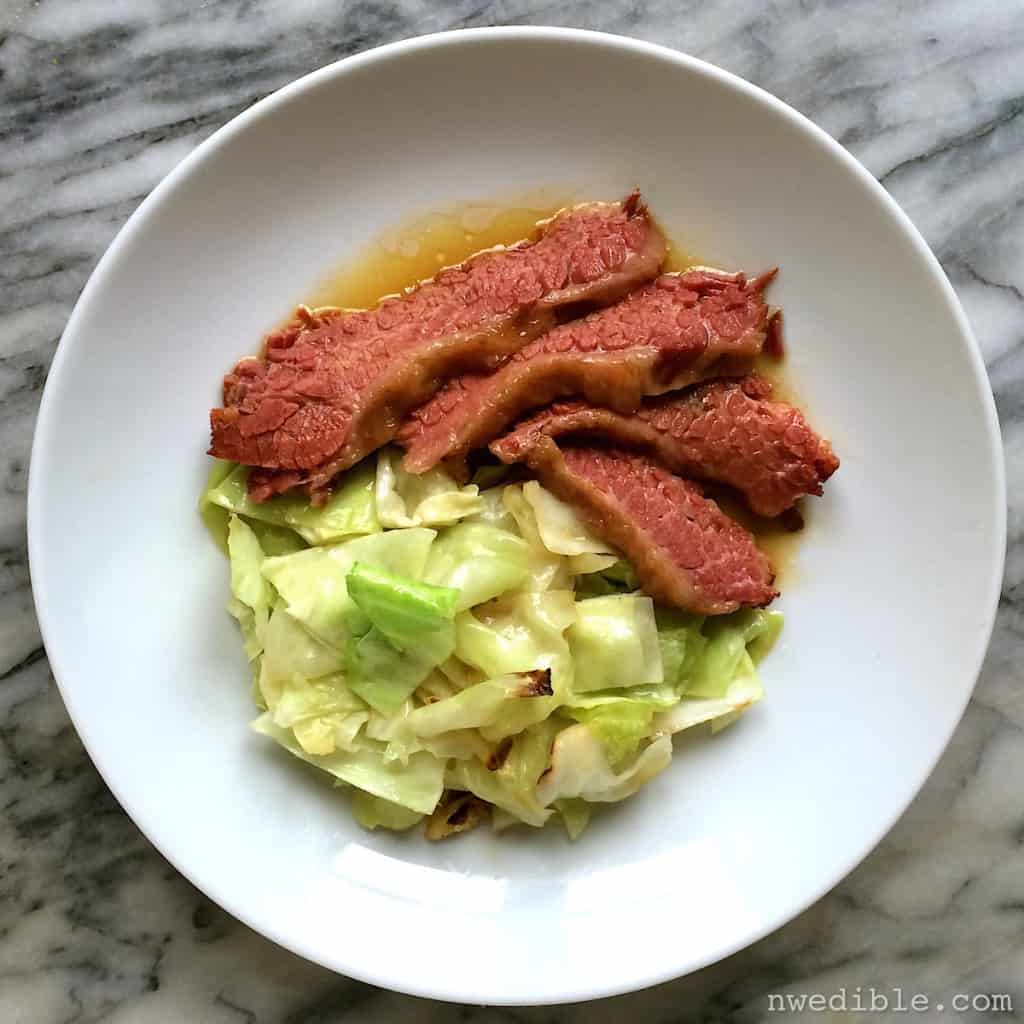
Final Results: Flat
Final Results: Point
Printable Recipe For Corned Beef Brisket At Home
Corned Beef Recipe
Prep
Cook
Total
Yield 4 to 6
Ingredients
For The Brine
- 1 cup kosher salt
- 1/2 cup organic sugar
- 1 1/2 teaspoons pink salt
- 2 teaspoons black peppercorns
- 1 teaspoon mustard seeds
- 2 teaspoons coriander seeds
- 1 teaspoon hot red pepper flakes
- 1 small cinnamon stick, crushed or broken into pieces
- 2 bay leaves, crumbled
- 7 whole cloves
- 1 tsp dried garlic, or several fresh garlic cloves, peeled and smashed
- 1/2 teaspoon ground ginger
- 3 star anise pods
- 2 quarts water
To Complete The Recipe
- 1/2 brisket, about 4 pounds, trimmed
- 4 cups apple juice or apple cider
- 2 star anise pods
- 4 whole cloves
Instructions
Make The Brine
- Combine the kosher salt, sugar, pink curing salt and all spices in a large food-safe plastic tub or bowl. Bring 2 quarts water to a boil and add to the brine mixture. Stir well to ensure all the salt and sugar dissolves, then set the brine aside to cool to room temperature.
Cure The Beef Brisket
- Fully submerge the trimmed beef brisket in the cool brine. Cover tightly, then transfer to the refrigerator.
- Brine beef brisket for at least three days, and up to a week. Once per day, stir the beef in the brine and make sure it’s fully submerged.
Braise the Corned Beef
- Adjust the oven rack to the lower-middle position and preheat the oven to 325 degrees.
- Removed the corned beef brisket from the brine and rinse well.
- Add the brisket, apple juice, star anise pods and cloves to a large, oven-proof pot or Dutch oven. Bring the apple juice to a gentle simmer over medium heat, then cover brisket with a parchment drop lid (optional) and the tight-fitting lid from the pot or Dutch oven.
- Transfer the pot to the oven and cook for about 2 hours, until the corned beef brisket is falling-apart tender.
- Slice brisket across the grain and serve hot, with sauteed cabbage and potatoes if desired.
Footnote: Pink Curing Salt, Prague Powder, Nitrites, etc.
Pink Salt, also called Prague Powder, InstaCure or DQ Salt is a curing salt. You don’t use it for flavoring or seasoning – you use it to preserve meat and a little goes a long way.
It’s called Pink Salt because it is dyed pink so no one mistakes it for table salt. This is what it looks like:
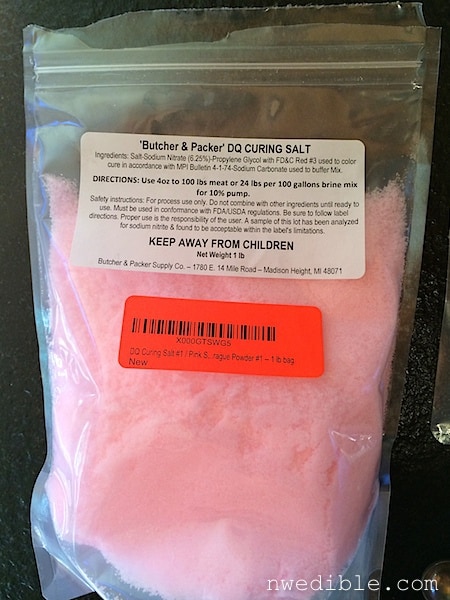
It is NOT the same as Himalayan pink salt! I saw a website telling people they needed to use Himalayan Pink Salt to cure their meats and I almost choked on my slab of pate. Not the same thing!
So, to emphasize: Himalayan salt – or any other fancy boutique finishing salt of any color at all – is NOT what you need here.
The Two Standard Formulations of Curing Salt
Prague Powder #1 (also called InstaCure #1) contains table salt and 6.25% sodium nitrite and is used for sausages, cured meats, pates, deli meats, etc that are cooked – smoked, baked, roasted, canned, whatever. Basically any cured meat that isn’t long-aged like a dry-cured salami. This is what we use when we make corned beef, bacon, Canadian bacon, etc. You can get it here.
Prague Powder #2 (also called InstaCure #2) is used for long aged dry-cured meats like prosciutto and hard salami. It has table salt, sodium nitrite (6.25%) and sodium nitrate (1%). The nitrate acts as a kind of slow-release preservative for very long-cured meats. We don’t use it to make corned beef or other short-cured items.
Nitrites? Are You Ni-Trying To Kill Me?
“Wait!” I hear some of you saying, “Nitrites! Oh my God, evil toxic additives.” Hold on a second – before you slam your laptop lid in disgust, let me break down my position on Pink Salt for you.
Remember our old frienemy Mr. Botulism Toxin? (See: How Not To Die of Botulism) Did you know that botulism was first described “as a ‘sausage poison’ and ‘fatty poison’, because the bacterium that produces the toxin often caused poisoning by growing in improperly handled or prepared meat products.” (Wikipedia.) Even botulism’s name comes from a cured meat product: botulus is Latin for sausage.
Sodium nitrite in the form of pink salt, when used according to established standards, prevents the growth of C. Botulinum and the development of the botulism toxin in cured meats. That’s why it’s in there. As an added bonus, the nitrite enhances color, flavor, and texture in the cured meat.
Okay, so on one hand we have this established risk of botulism growth in improperly cured meat products. On the other hand we might have the potential risk of nitrites. So we have to ask ourselves, what is the risk from nitrites when used according to established guidelines? I believe the answer is – little to none, but of course this is something you should investigate if it concerns you. For more info, I recommend The “No Nitrites Added” Hoax by Michael Ruhlman. I am, personally, firmly in the pro-Pink Salt category.


